Blog Posts
Click-Once Deployment In GitHub
26 June 2014
|
Edit Post
Overview
I’ve decided to use click once for my new OpenSource app called Gallifrey.
You can get/see the app on my GitHub account at https://github.com/BlythMeister/Gallifrey/
This blog post will try and explain the decision why we have used click once and how I have gone about implementing it.
What is Click-Once?
Click-Once is an easy way to regularly push updates out to your windows desktop apps.
Click-Once can install updates automatically on application start, or you can handle this manually within your app.
Why Is Gallifrey Using Click-Once?
We have decided to go with the manual check approach, the reason for this is that we can integrate this experience into the app, rather than having a launcher that downloads the updates. Therefore we operate in a similar way to other apps like Spotify whereby the updates are downloaded and installed, all the user has to do is restart the app.
How Does It Work?
GitHub offers a “raw” version of all its files, and this can be used to serve the application.manifest from a click-once application over the internet.
Changes can be made an published locally to disk, and then when the changes are committed into GitHub they are ready for everyone’s application to search and download the new versions.
From Visual Studio the publish of click once is done into 1 of 2 directories depending on the version of the app. The “stable” version will publish to “....\deploy\stable" whereas the beta will publish to “....\deploy\beta" This is just so that someone with a Stable version doesn’t accidentally get beta installs.
The update URL is then set to “https://raw.githubusercontent.com/BlythMeister/Gallifrey/master/deploy/stable/” or for the beta version “https://raw.githubusercontent.com/BlythMeister/Gallifrey/develop/deploy/beta/” This is the path to where the updates are, once published on GitHub.
The Gallifrey App using click-once will know to go to this URL when checking for updates. The great this about this is that pushing updates is as simple as pushing a new version into GitHub. The only pain point is having to manually perform the publish prior to the push into GitHub.
This means that we have 2 installers. The first works from the master branch and is for the stable version. This can be downloaded here: https://github.com/BlythMeister/Gallifrey/raw/master/deploy/stable/setup.exe The second is the beta version which is from the develop branch and can be downloaded here: https://github.com/BlythMeister/Gallifrey/raw/develop/deploy/beta/setup.exe
Both versions can be linked from external websites as the Gallifrey GitHub pages site shows: blythmeister.github.io/Gallifrey
And you can just link to a specific version as we have done on our Atlassian Marketplace page! https://marketplace.atlassian.com/plugins/Gallifrey
The Pain Points
There are a few pain points to get around with using this approach.
- GitAttributes - Since your pushing XML and .deploy files you don’t want your Git client to change the line endings. You can add a .GitAttributes file to your repository (check the one in this repo) that will tell Git that all “.manifest” or “.deploy” files are binary and should not be compared or adjusted.
- GitHub raw seems to have a cache of some description, so when requesting the latest and greatest version, sometimes this is out of date. From my experience, the updates are there within 5 minutes, so it’s fully workable.
- You have LOTS of files in your deploy folders! Git stores everything in history, so the more versions you push, the bigger your repo gets. Even if you clean up the files, someone has to pull all the history in, which could over time become cumbersome. Though, we are not talking GB’s of download in Gallifrey (Yet!)
I hope that this is useful to you and I’m happy to help anyone else who is trying to get a click-once app deployed using GitHub :)
Auto Deploy To IIS Using PowerShell
14 July 2012 | Edit Post |
Overview
At 15below we are using a tool called Octopus for our product deployment. The tool works well, but it’s integration to install our web-based application products doesn’t suit our needs.
However, with Octopus we can write custom PowerShell for deploying our applications. This got us into a situation where we have 3 different versions of IIS across our servers, each of which has a different method of installation, but we want a nice and easy way we can trigger the creates. Cue a “clever” script.
Firstly, what are the differences between the versions:
- IIS6 (Server 2K3 & XP) - WMI needed to interact between IIS and PowerShell.
- IIS7 (Server 2K8 R1 & Vista) - PowerShell snap-in available for download (I would recommend using the Web Platform Installer)
- IIS7.5 (Server 2K8 R2 & 7) - PowerShell module, installed when selecting “Scripts” from IIS role feature installer.
The solution we came up with is hosted in the 15below public source code repository and sits inside the Ensconce application (more on that in a latter blog post, or link to 15below post) on GitHub. To see more information, or get the PowerShell scripts, click here.
The 3 PowerShell scripts we are talking about are:
- CreateWebsite.ps1
- createiis6app.ps1
- createiis7app.ps1
Both the create IIS app scripts have the same 3 callable functions, these are:
- CreateAppPool (which takes a string for the name)
- CreateWebSite (which takes name, local path, app pool name, application name, host header value & log location)
- AddSSLCertification (which takes website name to add to & certificate name)
Breaking these down, how does it work…
CreateWebsite.ps1
This will try to do a WMI control with IIS6, hiding any errors, but should it get a success, it will include the script “createiis6app.ps1”. Should the operation be unsuccessful, the “createiis7app.ps1” is included.
From this, you will be able to call any of the 3 functions outlined above.
Therefore, your PowerShell deployment only needs to include this PowerShell, and you can install into IIS 6,7 & 7.5. - helpful right!
createiis6app.ps1
Using only WMI controls, the functions are all callable once included (either directly or through the create website script)
createiis7app.ps1
So, as I’ve already mentioned, IIS7 and IIS7.5 operate in different ways and both require something extra to be added to your PowerShell session.
When this script is included, it will check if the IIS module is present to be imported, if it is, it will import it, if the import fails, or it’s not there it will try to locate and install the Snap-In.
If neither of these things is present it will return you an error.
This means that you don’t have IIS6, and you don’t have the required components for an IIS 7 install.
Summary
I hope that you may find this useful should you need to do any operations like this on your application deployment.
Feel free to head over to GitHub and check out the Ensconce application, and the IIS scripts. - You may find that the Ensconce application has other benefits to your deployment :)
Details of the Ensconce application functions can be found on the read-me within GitHub.
Local Service Network Service Or Local System Self Hosted WCF
15 June 2012
|
Edit Post
Overview
Recently I experienced a bit of confusion over the users you can run a TopShelf service as, in particular, one which started a WCF endpoint.
I would get an error, with a nice stack trace, but research on the Internet didn’t yield me an answer. - Once I had a solution, I thought I would share, so others don’t have to spend as long as I did try to resolve the issue.
So, the error I got was this:
System.ServiceModel.AddressAccessDeniedException: HTTP could not register URL http://+:8082/MyWCFService/. Your process does not have access rights to this namespace (see http://go.microsoft.com/fwlink/?LinkId=70353 for details). ---> System.Net.HttpListenerException: Access is denied
at System.Net.HttpListener.AddAllPrefixes()
at System.Net.HttpListener.Start()
at System.ServiceModel.Channels.SharedHttpTransportManager.OnOpen()
With a pretty long stack trace after!
Now, this does look like a useful error, with a link to a Microsoft post (http://go.microsoft.com/fwlink/?LinkId=70353). Brilliant I thought until I found clicking the link resulted in this…
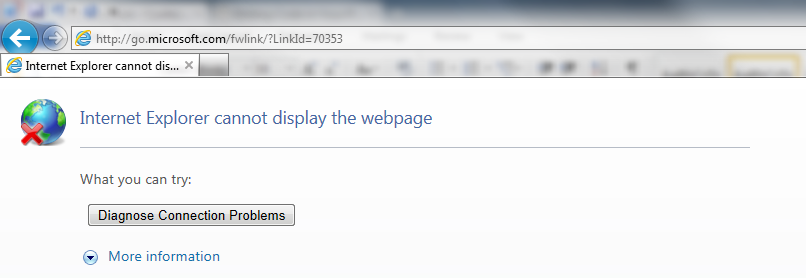 This was far from helpful
The first thing that confused me was the URL, which changed from “http://localhost:8082/MyWCFService” changed to “http://+:8082/MyWCFService/”. When looking at URLs, it would seem that the “+” symbol means “Generic host”, therefore it could be anything, as long as it is on this PC. The config could state “http://127.0.0.1:8082/MyWCFService/” whereby localhost and 127.0.0.1 are the same. The log file only shows the 1 value, a “+”.
A little scout around and I was able to understand that the user I was running my service under didn’t have sufficient permissions, and I should run as a more elevated “Administrator” user, sure enough, setting my windows service to run as the system admin did the trick, though, TopShelf doesn’t offer this as a default install address, you can just have:
- LocalService
- NetworkService
- LocalSystem
I eventually decided to work my way through the users to find out which one had sufficient permission to start the service, and it turns out “LocalSystem” does. – Which at the time, I thought was least likely to work!
Sure enough, I could change my TopShelf setup to be:
hc.Service<MyWCFService>(sc =>
{
sc.SetServiceName(Name);
sc.ConstructUsing(() => new MyWCFService());
sc.WhenStarted(cs => cs.OnStart());
sc.WhenStopped(cs => cs.OnStop());
});
hc.RunAsLocalSystem();
hc.SetDescription(Description);
hc.SetDisplayName(DisplayName);
hc.SetServiceName(Name);
And this worked like a charm!
This got me thinking about the 3 “RunAs” I had to choose between, and what purpose I would use each of them for, so lifted from a TechNet post (http://technet.microsoft.com/en-us/library/cc782435(v=ws.10).aspx).
LocalService
The Local Service account is a special, built-in account that is similar to an authenticated user account. The Local Service account has the same level of access to resources and objects as members of the Users group. This limited access helps safeguard your system if individual services or processes are compromised. Services that run as the Local Service account access network resources as a null session with no credentials.
NetworkService
The Network Service account is a special, built-in account that is similar to an authenticated user account. The Network Service account has the same level of access to resources and objects as members of the Users group. This limited access helps safeguard your system if individual services or processes are compromised. Services that run as the Network Service account access network resources using the credentials of the computer account.
LocalSystem
The Local System account is a powerful account that has full access to the system, including the directory service on domain controllers. If a service logs on to the Local System account on a domain controller, that service has access to the entire domain. Some services are configured by default to log on to the Local System account. Do not change the default service setting.
I hope that this post will help other to overcome the user problem I encountered faster than I did!
GIT 9 Months In
06 June 2012 | Edit Post |
9 months ago I had never heard of, let alone use GIT for source code repository. My main exposure to SCM systems was through Microsoft SourceSafe 6 at work and SubVersion at Uni.
Then the company I work for decided that SourceSafe was dated, and something new was needed. Introducing GIT. Having various issues myself with SourceSafe, I welcomed the brave new world, though it would be a learning curve.
Now, having seen and used GIT for quite a few months using GIT extensions for Windows, I’ve found that this does everything I would have wanted source control to do.
With multiple release branches, and also multiple work in-progress branches in use, managing and merging my work between has turned out to be a doddle.
At first, the concept that I had my own local copy of a repository on my machine which I needed to keep in sync with a shared repository seemed a little odd, and often lead to some pretty nasty merge issues. Once I got the hang of using branches, and getting my pulls, commits and pushes in the right order, I truly was cooking on gas.
So, with thousands of changed lines of source code, and over 600 commits, I am happy to say that moving to GIT from SourceSafe 6 was a really good move!
Recently, I found a really nice feature using GIT and GIT extensions, the ability to retrieve a previously deleted branch, very helpful when stupid codist (that’s me!) Thought the branch was a dead stub branch, rather than something to merge in. Thankfully (with the advice of a co-worker) I was able to get back hours, if not days of work.
To round off, if you’re looking to change your source control, then it will be worth checking out GIT (http://git-scm.com/). Also, for a free (on something open source) repository hosting, GitHub is also worth a look (http://github.com).